Layers in AtlasOMS provide the ability to configure Apps and App Scenes to customize information for users. Layers are the building blocks of the entire AtlasOMS system.
Below is an example layer created for an App using the Grid Scene to show Active 811 Tickets. The tabs above the grid relate to the configured layers: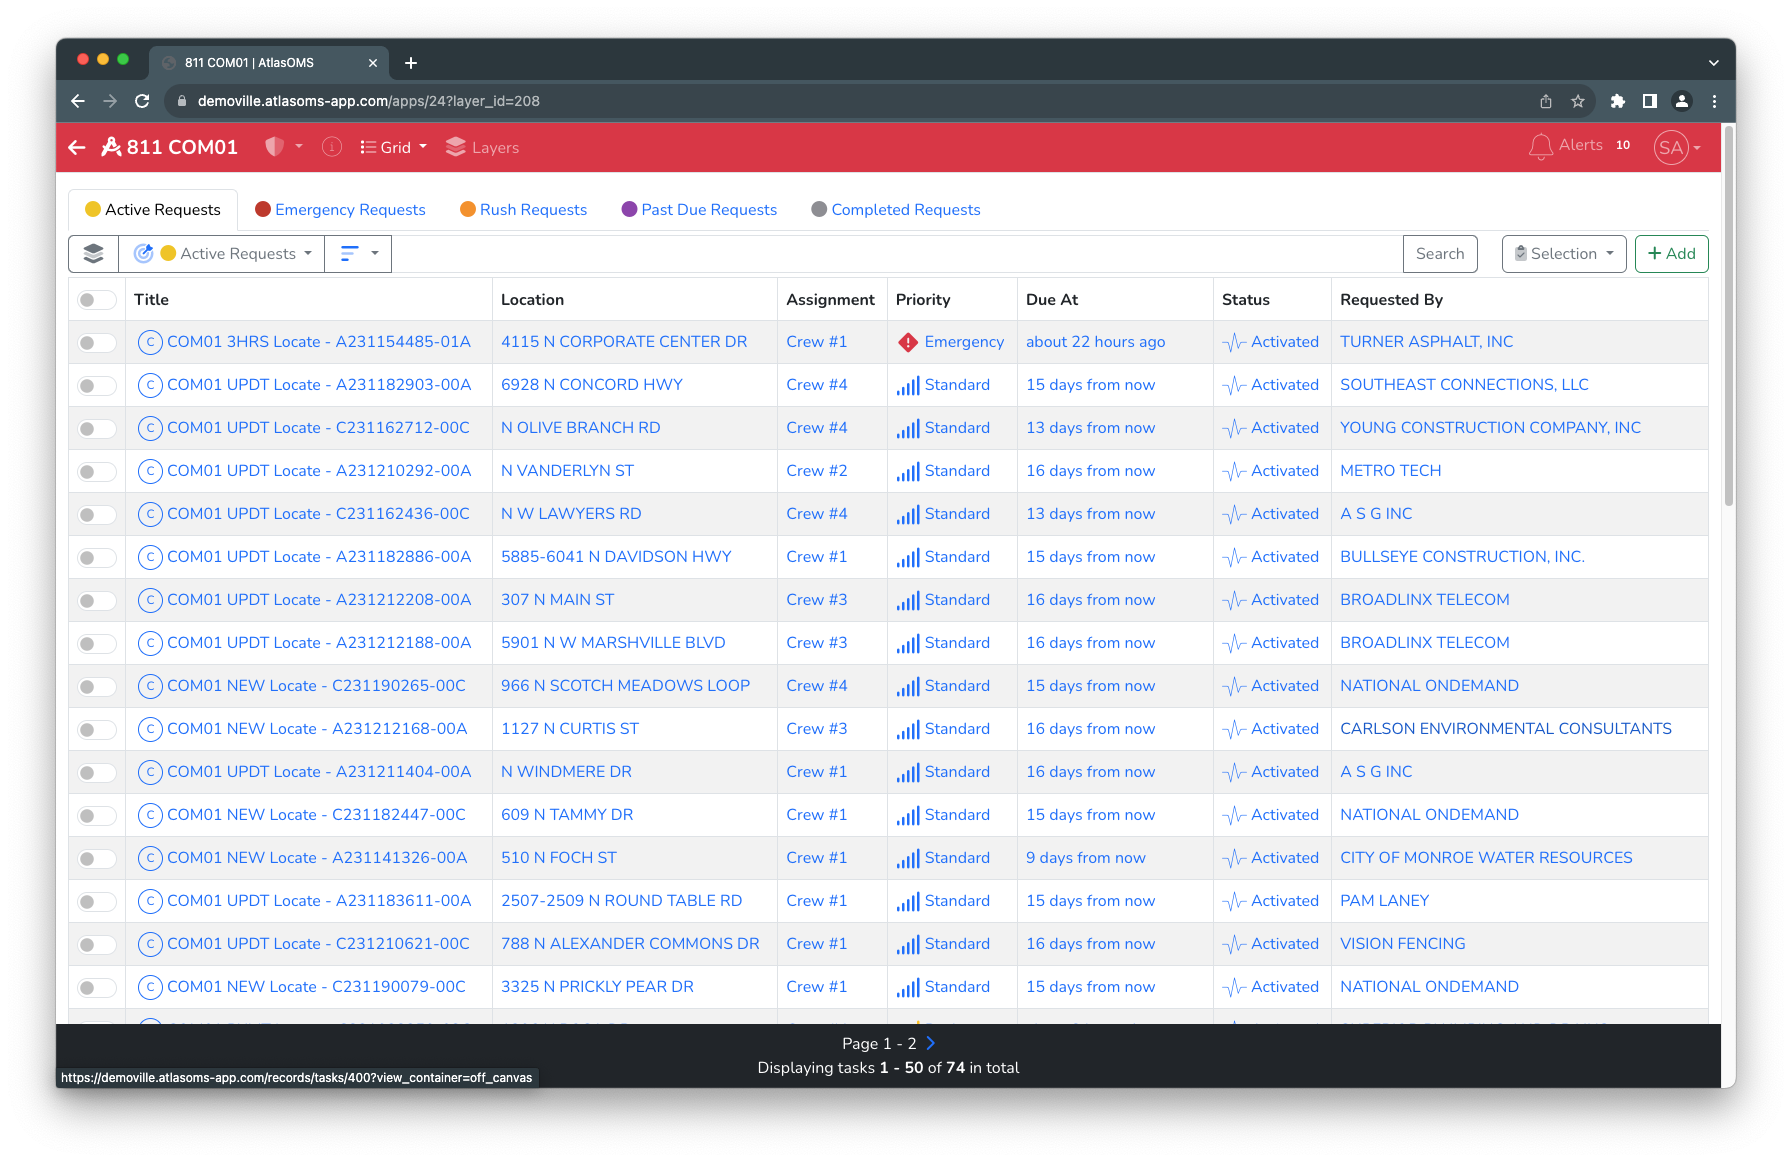
Another layer was also configured in the App using the Grid Scene to show Emergency 811 Tickets to the user: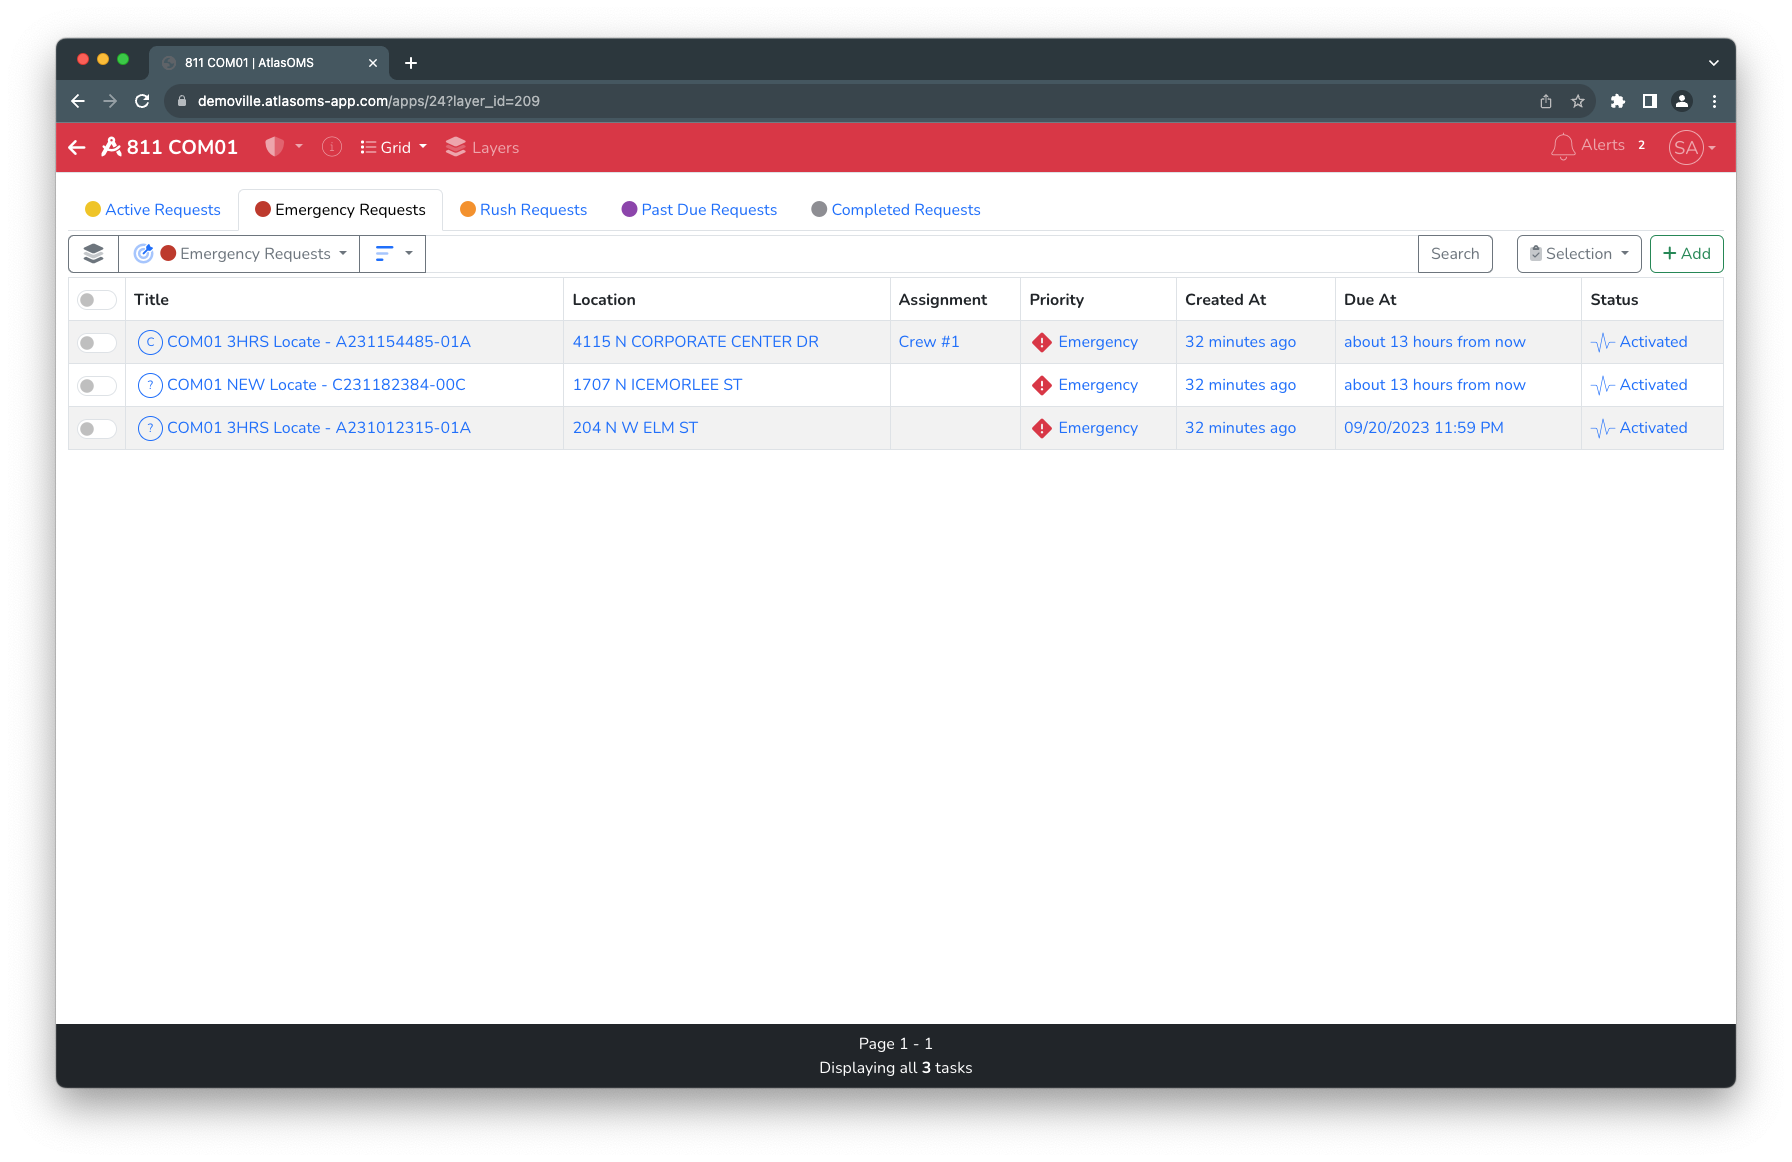
Additionally, a layer was configured to show the Completed 811 Tickets to the user.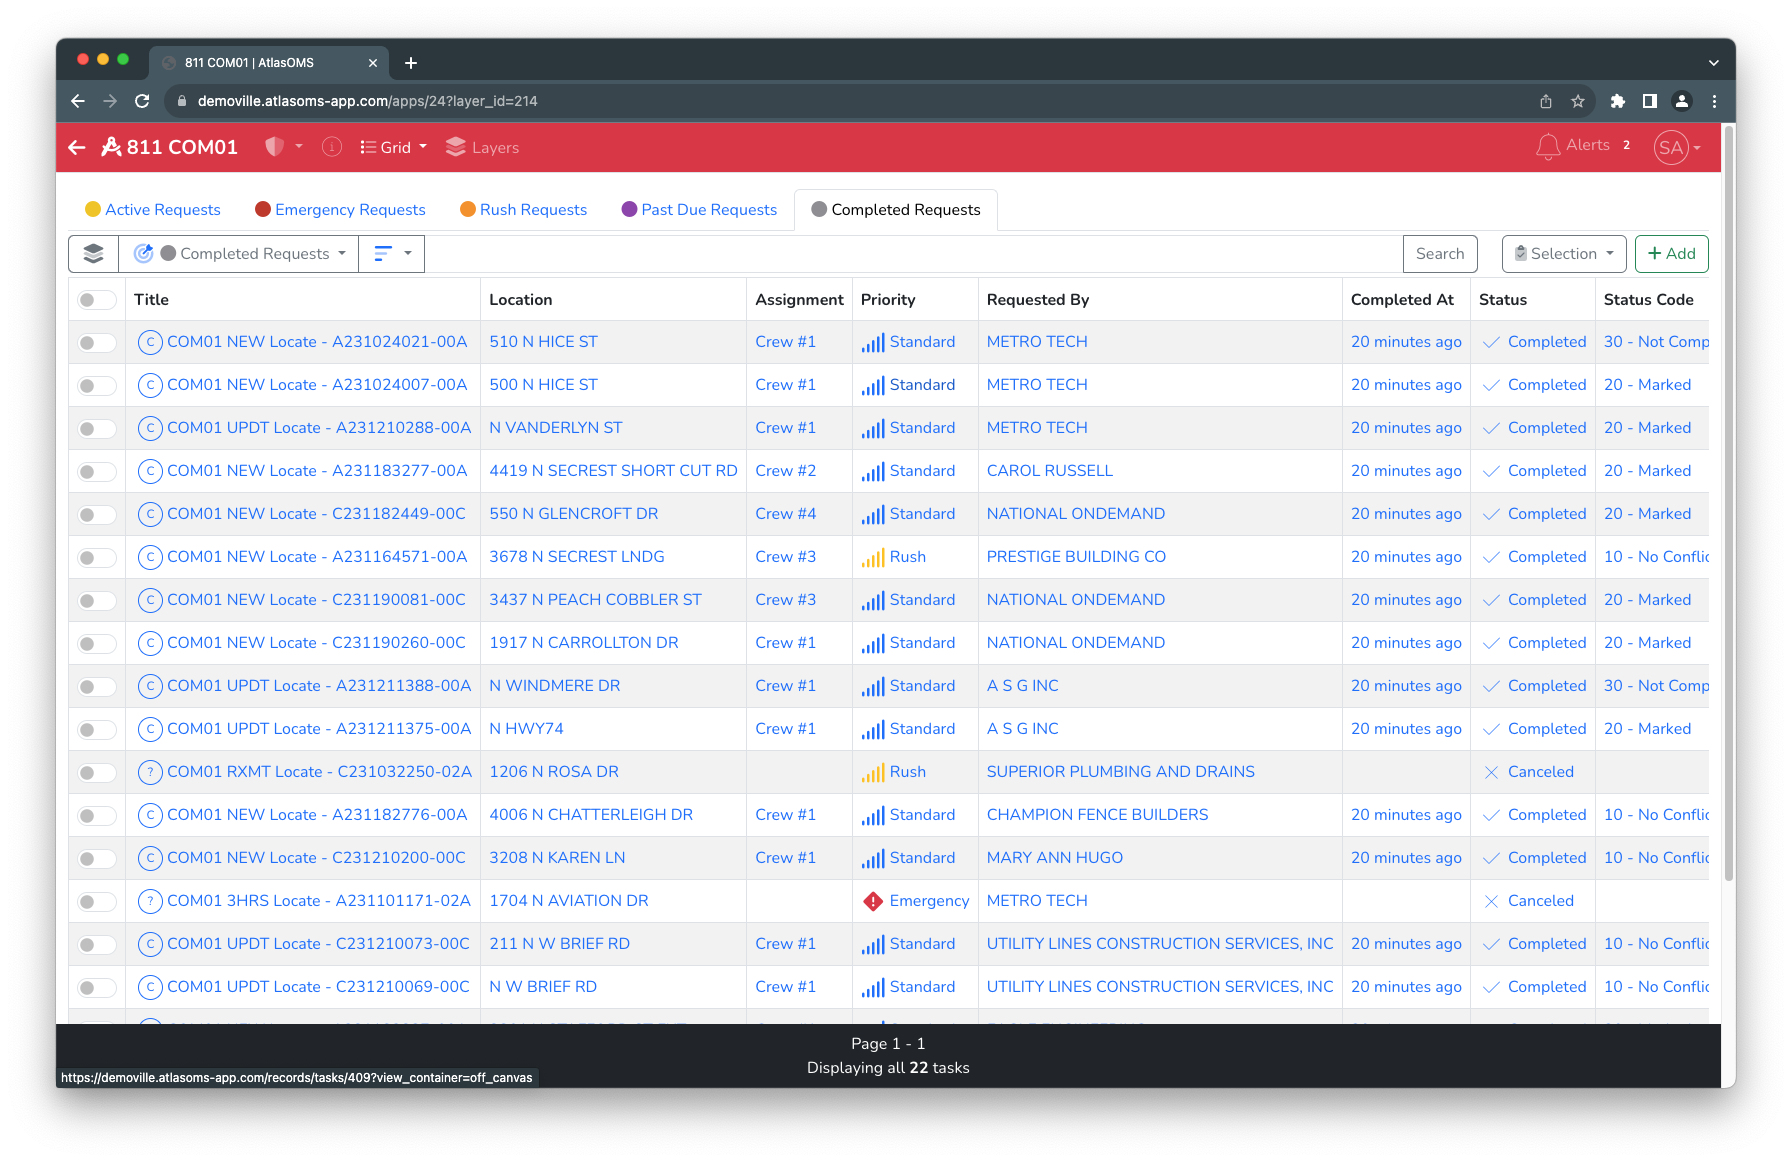
Each layer can be customized to configure the properties, filters, attributes, and symbology. Attributes generally applies to Grids (columns), and symbology generally applies to Maps (points).
Clicking Layer Properties in the page header on all Scenes opens the Table of Contents. The TOC enables the user to show/hide layers, add new layers, edit layers, and subscribe to layer notifications via App, Email or SMS. NOTE: Some functionality requires manager/administrator privileges.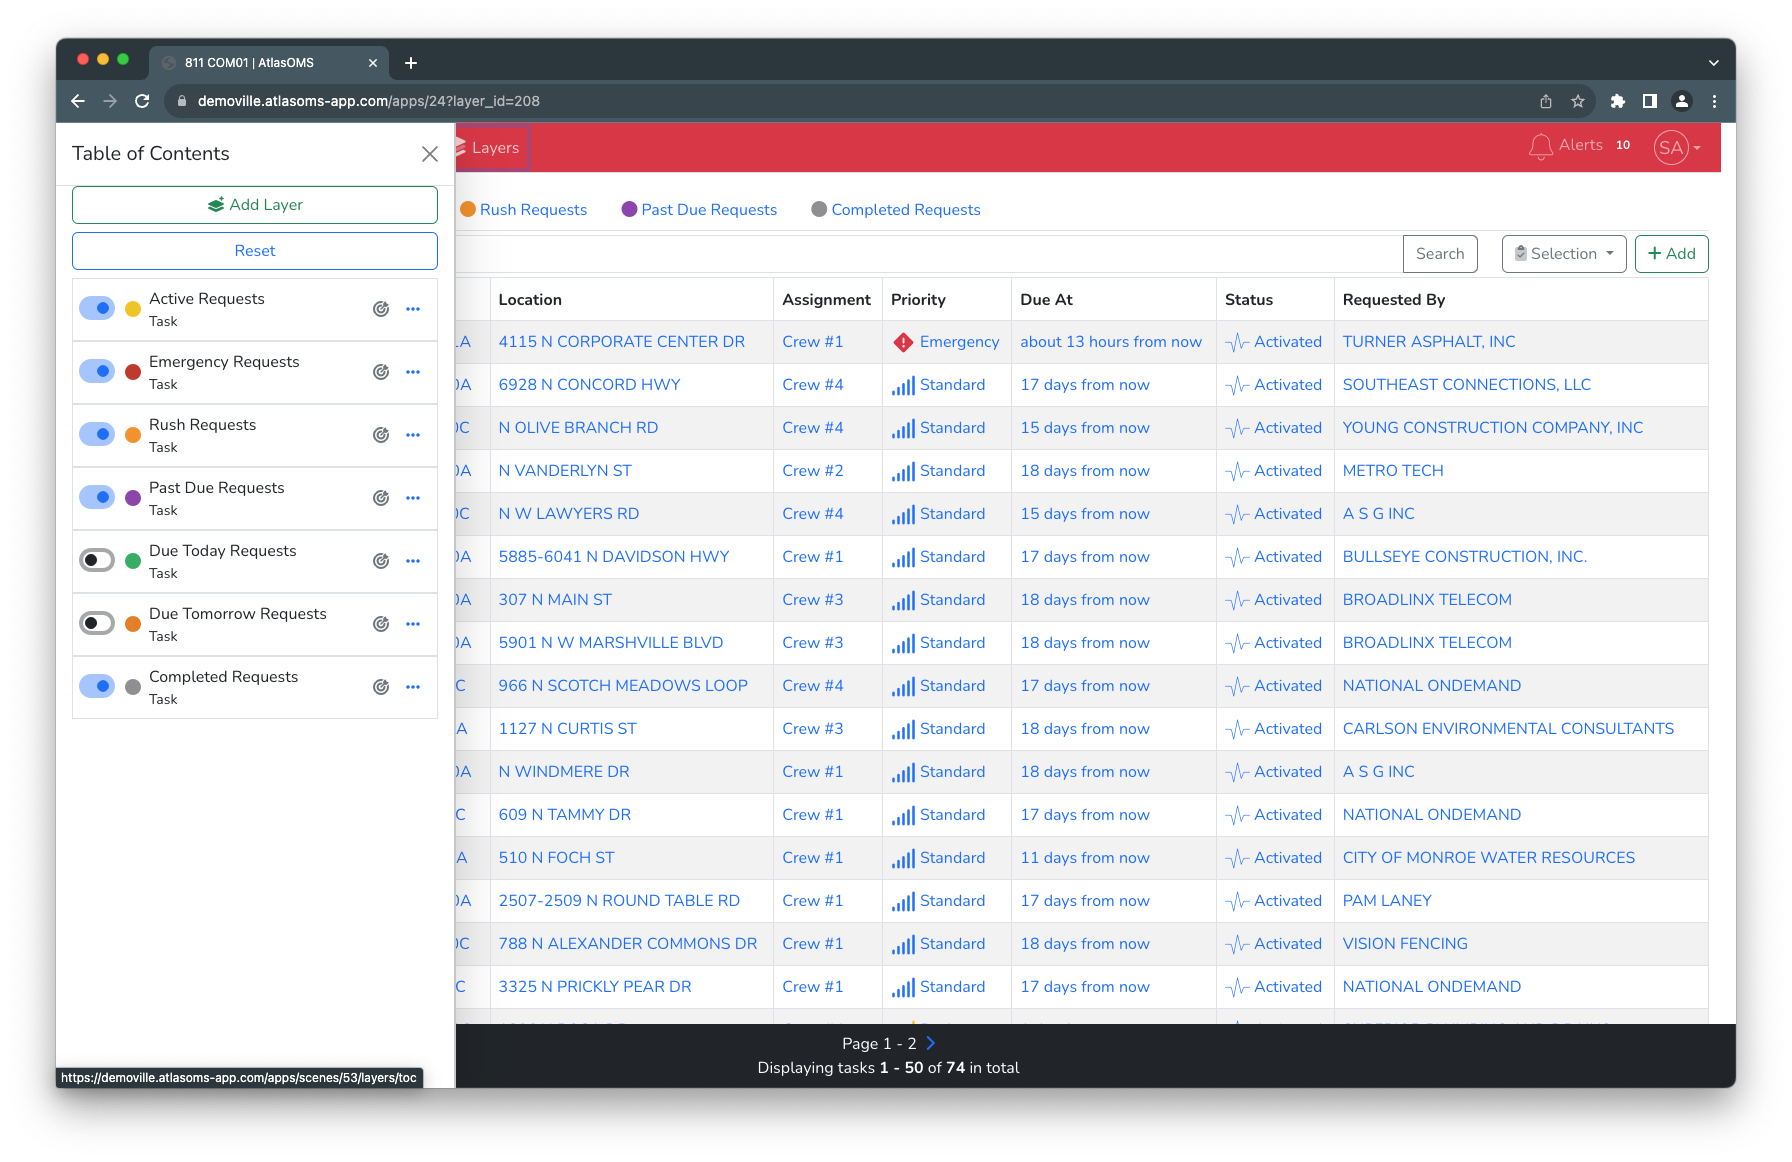
NOTE: In Grid Scene the order from top to bottom of the layers affects the orders of the tabs from left to right.
The following screenshot is a view of a configured Map Scene, layers on the Map Scene can be seen on the map configured with symbology to differentiate themselves.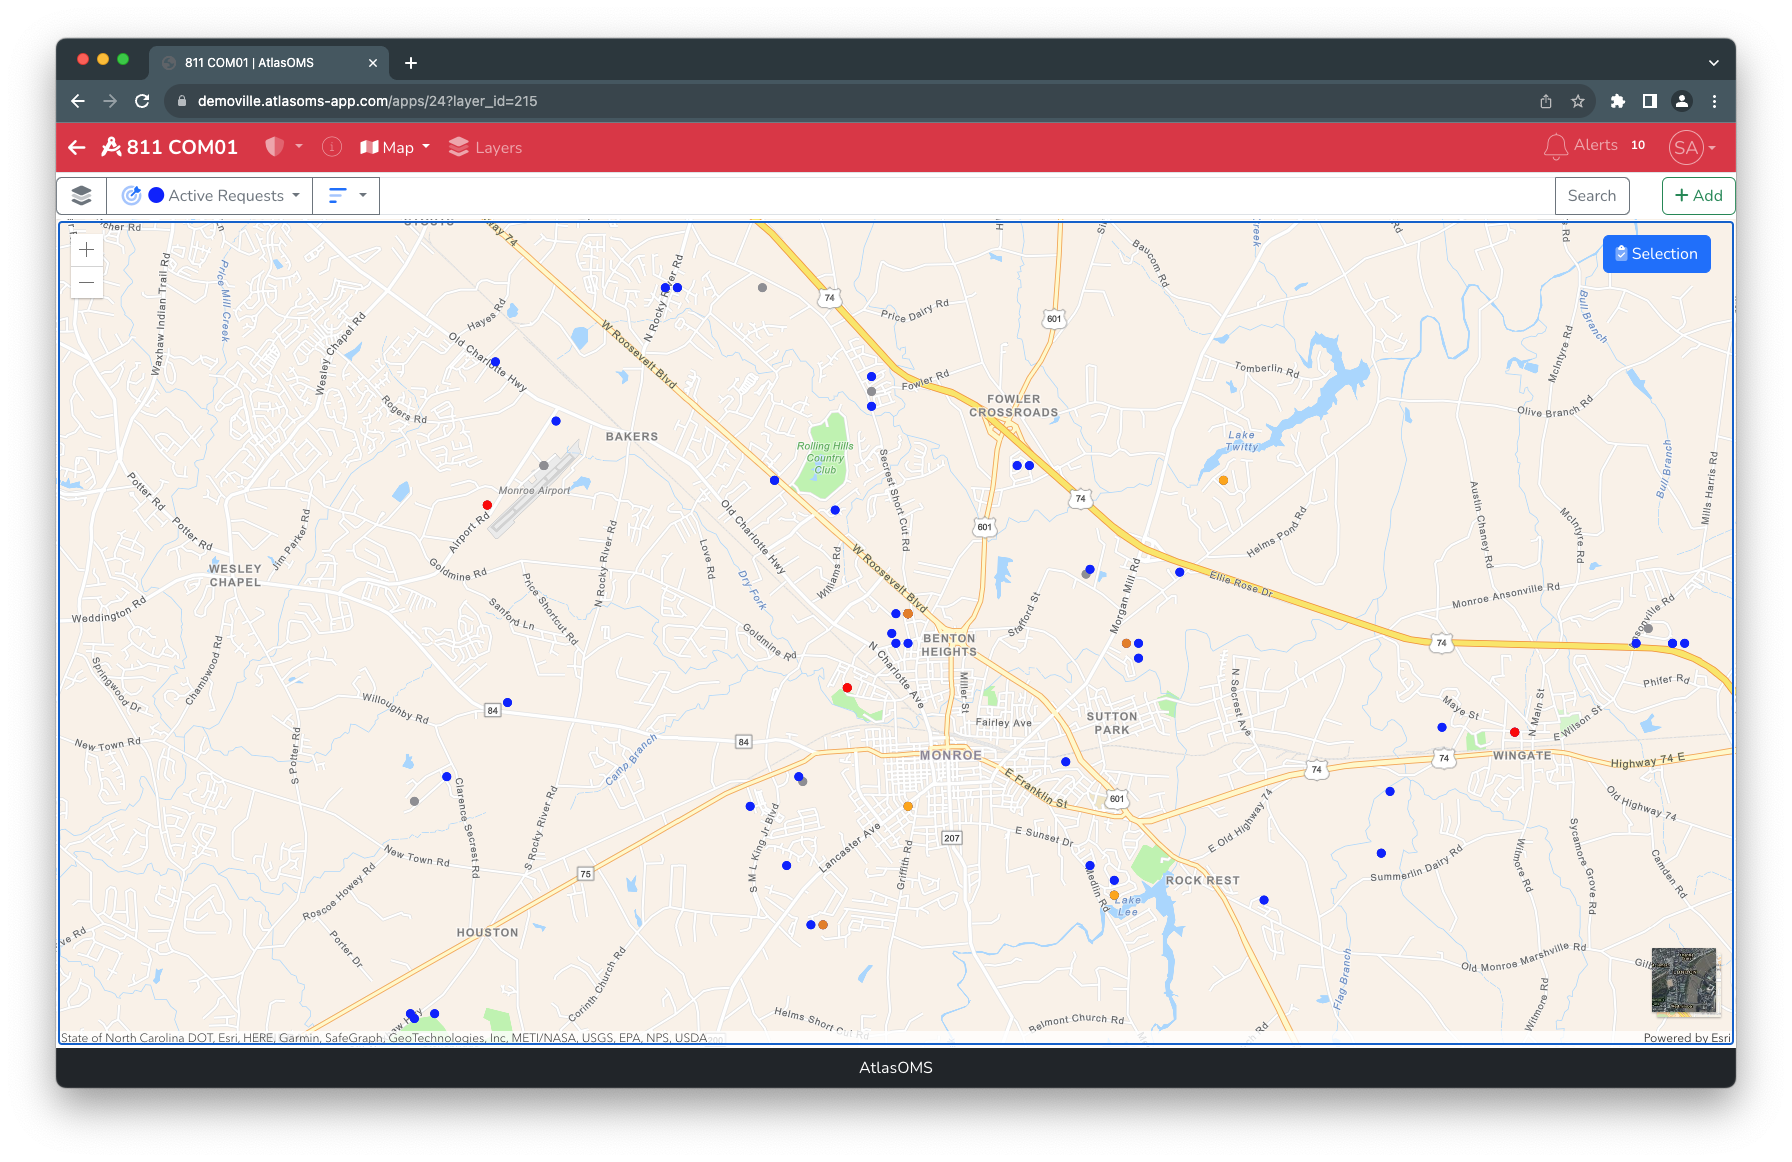
Consistent to the Grid Scene, the user can click the Layer Properties button in the header to open the Table of Contents. The TOC enables the user to show/hide layers, add new layers, edit layers, and subscribe to layer notifications via App, Email or SMS. NOTE: Some functionality requires manager/administrator privileges.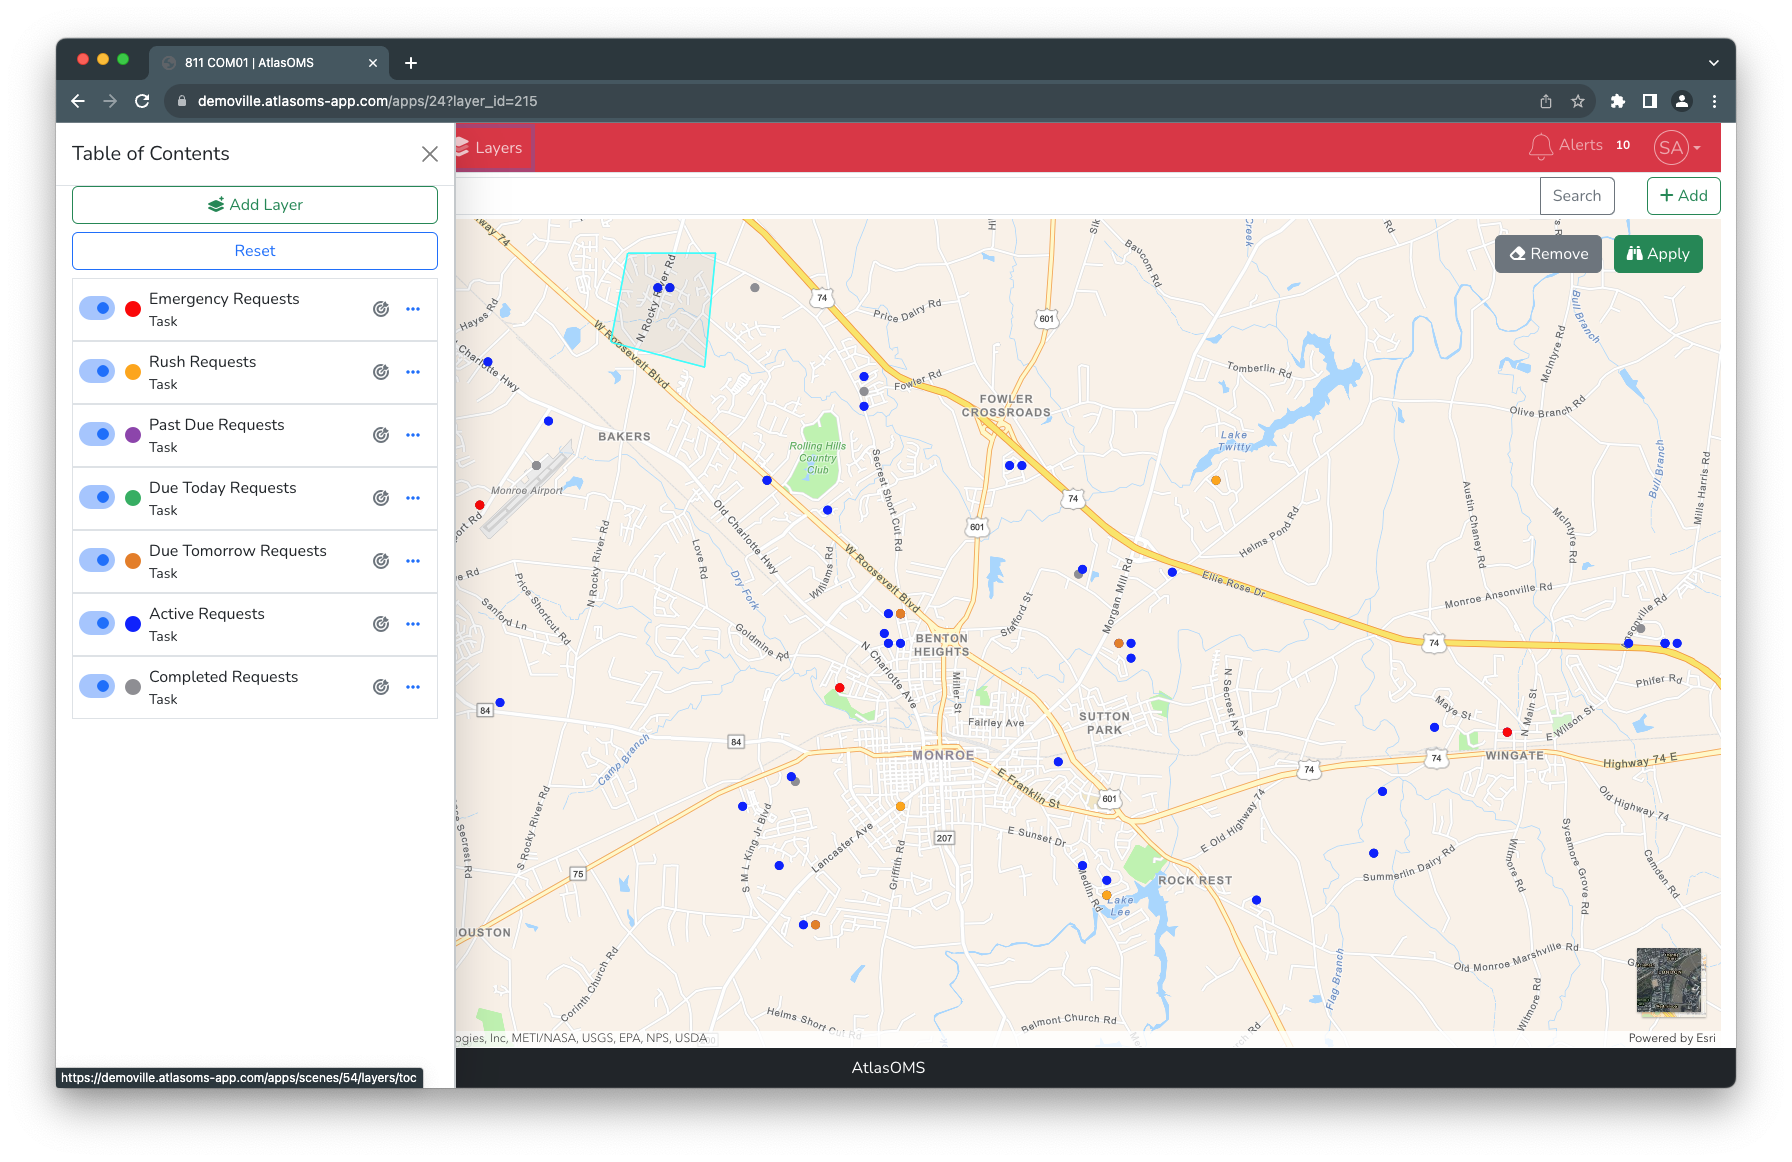
NOTE: In the Map Scene order is important if a record is present in more than one layer. Symbology of layers located higher up on the Table of Contents take priority over ones lower down.
